More often than not, users might need to create new elements, such as employees or products, as part of the planning process. The Add/ Delete Action enables users to dynamically create or delete elements in a dimension.
Add Element
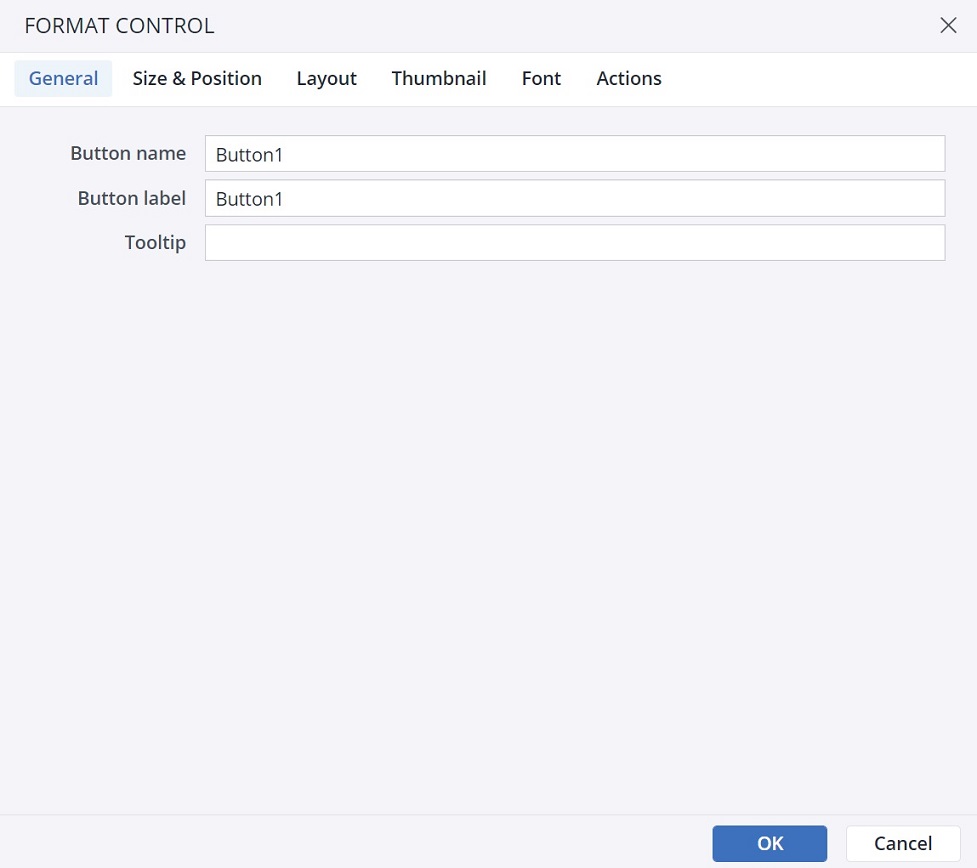
To set up the Add element action, first select a form element. You can use a button, checkbox, list box, Date Picker, or ComboBox for this action. As an example, a button is chosen here.
-
In the Insert menu, click on the Button icon.

-
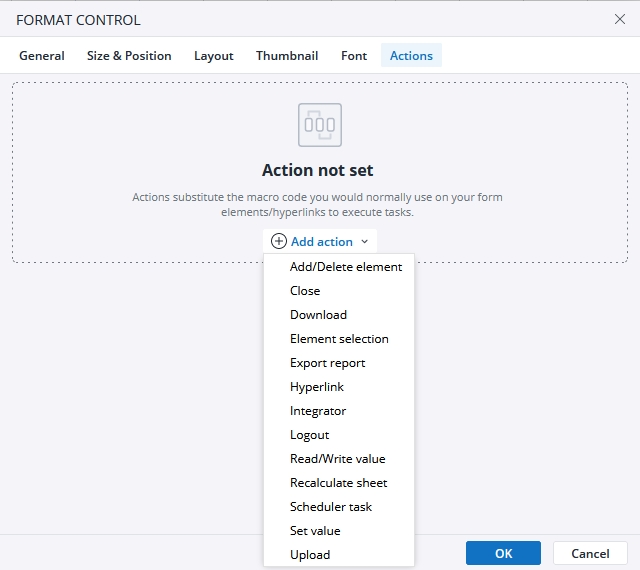
Click on the Actions tab and click on Add action. Select the Add/Delete Element action.
-
The next dialog offers several options for the Action. Using the close button, you can close the action, and by clicking on the Bin icon you can delete the action.
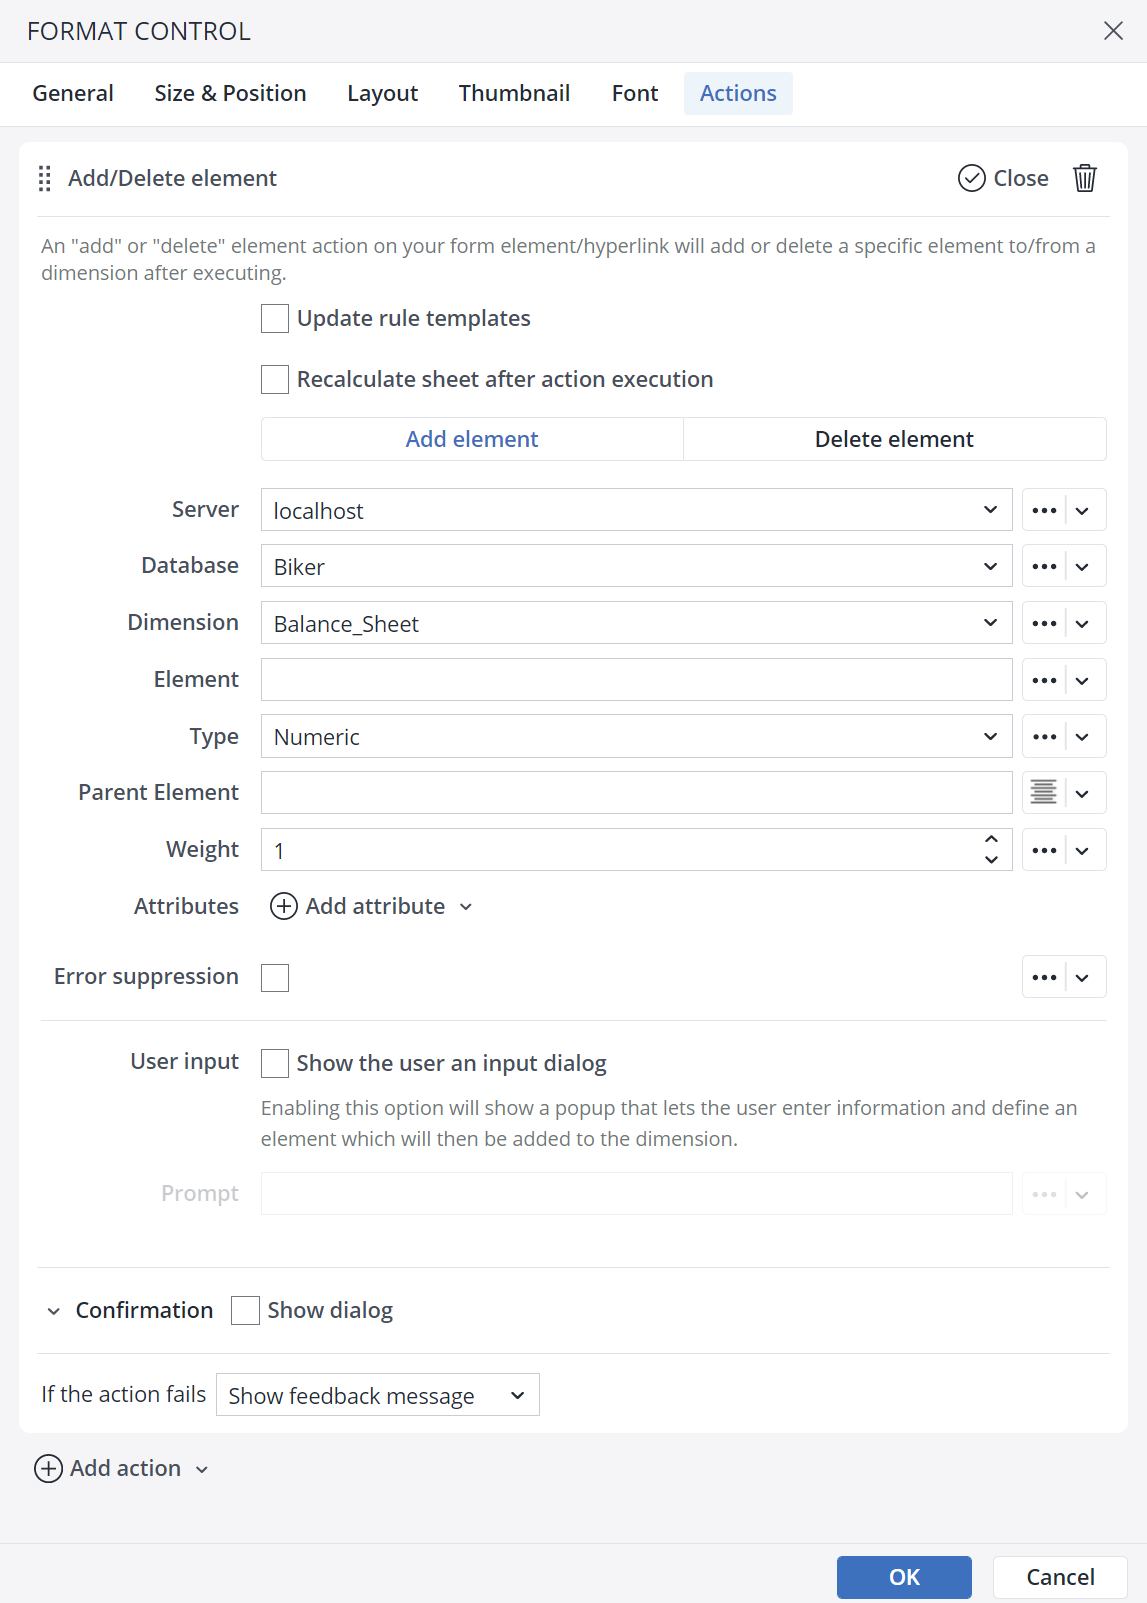
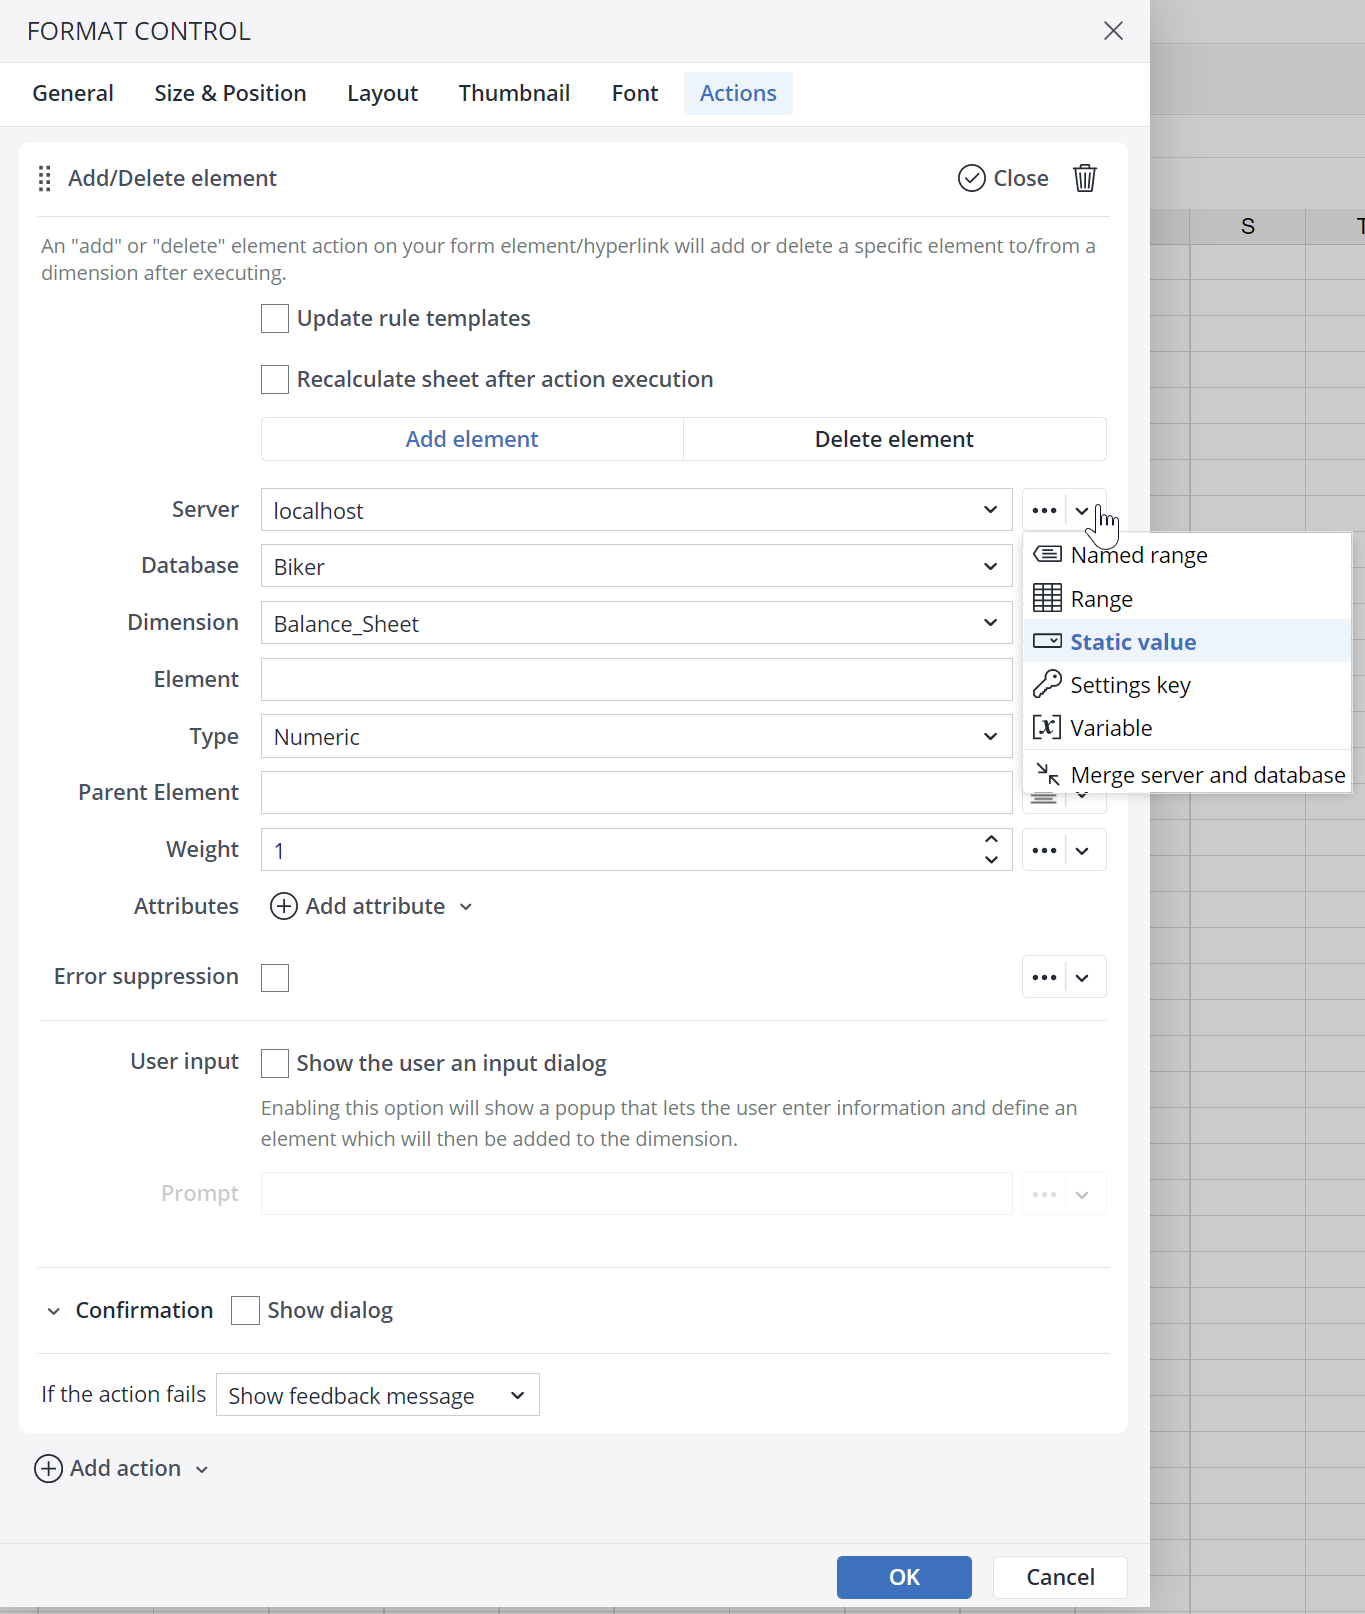
In this dialog, you can choose the Weight, Parent Element, Type, Dimension, Database, and Server of the Element you need to add. Here you can also opt to enter the In-Memory DB connection and the database in a single, merged field, rather than entering them separately. This feature is helpful when a single named range (or @variable) is used, such as "rngServer" containing a value such as "localhost/Demo."
-
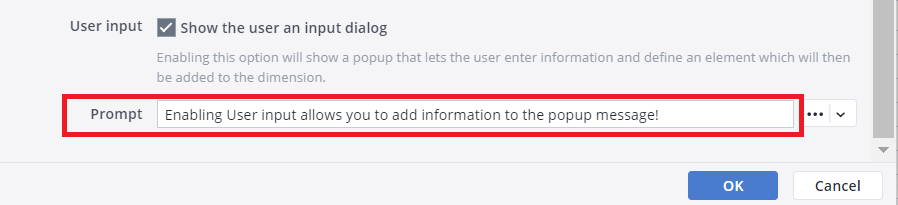
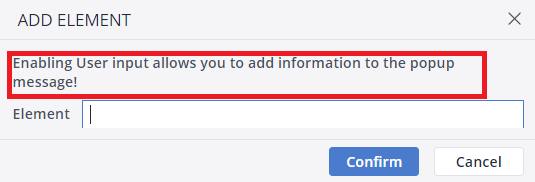
Enabling the User input option allows you to add information/ definition for the element that will be added to the dimension. This definition is shown to the end user through a pop-up message.
-
Label and format the button as desired.
Delete Element
By clicking on the Delete element button, the Delete element dialog shows up.
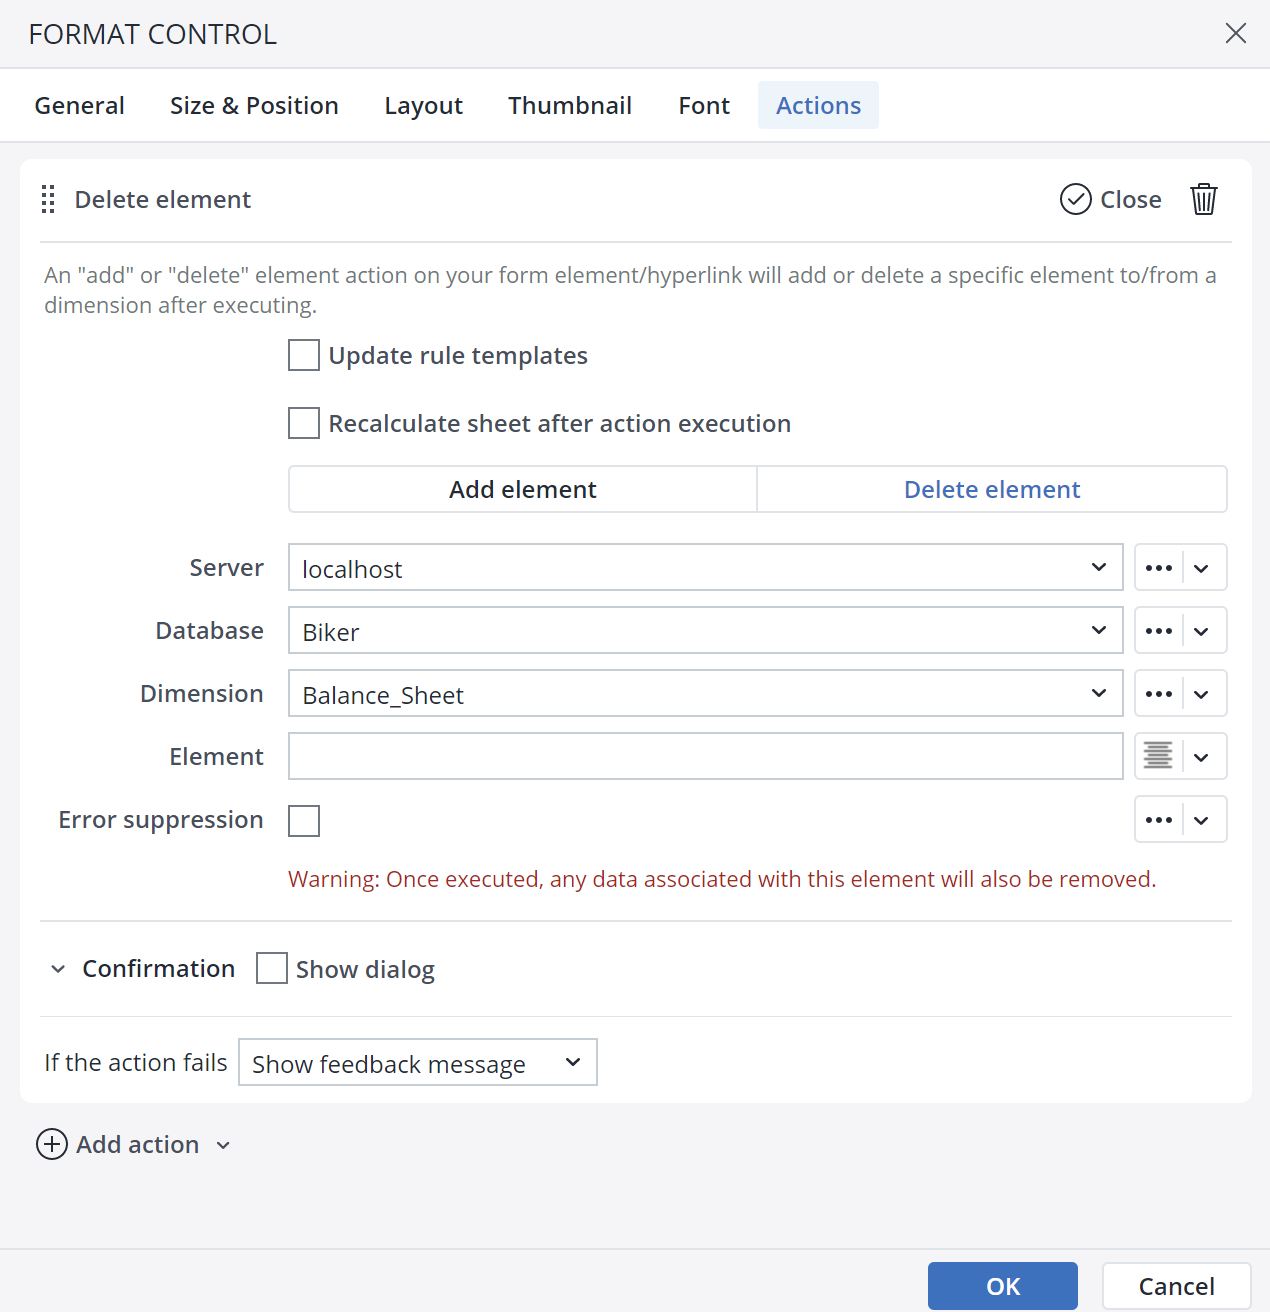
Here you can choose the Server, Database, Dimension, and Element that you want to delete.
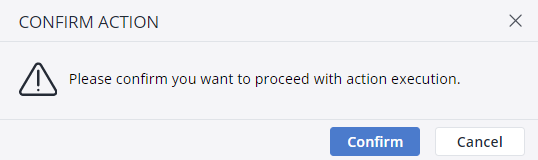
Add/ Delete element Confirmation dialog
When you choose the Add/ Delete element action in the Type of action dropdown menu, you can see the Confirmation dialog option at the end of the action dialog.

In the Confirmation dialog, you can customize a confirmation message for the end user. You can add a Title, Body, Primary button label, Secondary button label, and an Icon to your customized message. The screenshot below shows a confirmation message:
Action failure
You can choose between two options in case an action fails. First, choose to show a feedback popup, and second, ignore the failure and go to the next action.
Updated July 3, 2025