Models are predefined applications, consisting of files/reports, OLAP databases, Integrator jobs, scheduled tasks, and settings. Not every model must contain all objects mentioned above. Models are created by a model designer, then shipped in a so-called package to the end-user, who can configure and customize them. The shipping can happen via the new Marketplace (a panel in Jedox Web, which shows content from a centralized server), or a model can be installed directly from a .jdxp file, which is the format used for models in Jedox. The user can see and change installed models in the My Models start page in Jedox Web.
1. Models Installation
You can install Models from the Marketplace, or from .jdxp files. Models can be installed multiple times in parallel, using namespaces. Namespaces behave similar to "installation directories". When installing a model several times in various namespaces, most contents of the model will be unique and can be modified independently; you can later also install updates for the model separately. The exception is the database created during the installation (if there is a database being created). By default, the model will always use the same name for the database it creates. However, if the installation permits the setting of a customized database name, you can choose a different name in each separate model installation / namespace.
By default, the installation dialog suggests to install the model in the "global" namespace.
When the model installation is executed, Jedox Web generates the required content locations e.g. in Reports and Designer; model contents there are always located within the "models" group. If the model includes database contents, the installer will execute one or several Jedox database scripts to set these contents up.
Model Installation from the Marketplace
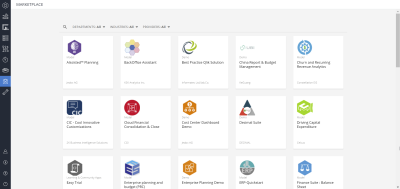
The Marketplace panel shows all published models.
When clicking on a specific model in Marketplace, the user will be shown the details for that model, such as a description, screenshots, and a changelog of previous model versions.
To install a specific model, click the “Install” button of that model in Marketplace. This will prompt an Installation Wizard.
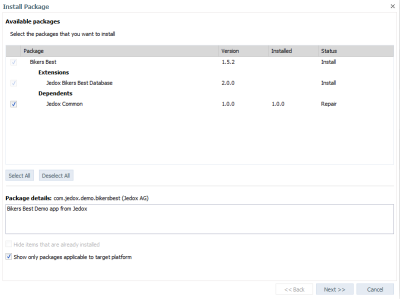
The install dialog then shows a detailed overview of a model’s contents, such as model extensions. Model extensions usually contain additional content, like database sample data, which is not essential for usage of the model. If the model designer made installation of extensions optional, the user can uncheck the extensions they don’t wish to install here.
If the model installation requires the user to accept Terms & Conditions for usage of the model, the next page of the installation wizard will show the Terms and Conditions (opt-in). After accepting the Terms & Conditions and clicking “Next”, the wizard will show a page detailing the following installation steps. Another click on “Next” starts the installation.
If the model includes database contents, the user will usually be prompted for entering a name for the database that will be created, or modified by the model.
Model Installation from a file
When you receive a model that is not yet published in the Marketplace, or when you cannot access Jedox Marketplace (because of your geographical location, local firewall policies, or other reasons), you can install the models from a .jdxp file. To install a model from a file, click on the "Install from file" button in My Models, and then choose the model you want to install.
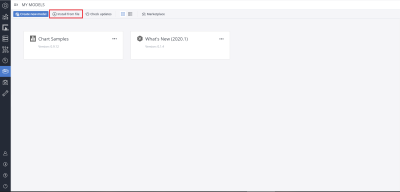
The rest of the Installation Wizard process is identical with the installation of a model from the Marketplace.
Notes:
- If you install a model from a file, you can upgrade it only from a file and not from the Marketplace. Also, models that are installed from the Marketplace, can only be upgraded from the Marketplace.
- When you cannot access Jedox Marketplace, please contact support to receive the model's file.
2. My Models start page
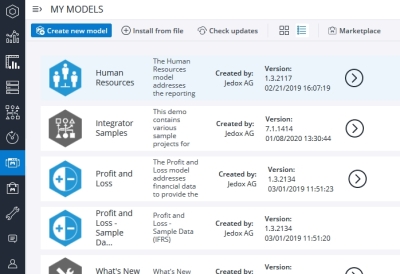
The My Models start page provides an overview for all models that were created or installed in your Jedox environment. The user can navigate to the reports of a specific model from My Models by clicking the arrow icon. Reports are also accessible by navigating directly to the Reports section of Jedox Web.
You can check for updates by clicking the button in the toolbar. Further options are available in the ellipses menu.
- Repair can be used if model contents have been inadvertently changed or deleted.
- Update (also in toolbar) is only available if there are changes to the model.
- Change installs / uninstalls selected parts of the model, such as sample data.
- Uninstall removes the local installation of the model, including reports, Integrator projects, settings, etc. Removal of database content is at the discretion of the model author; in the case of Jedox Models, database content is not deleted.
3. User Rights for Models
Access to the new My Models and Marketplace panels is handled via OLAP rights objects per role, and can be defined in Administration > Roles. Note that this only refers to the panels and action in those panels, but not access to model contents themselves, such as reports, databases, or Integrator projects. For My Models, the relevant right object is ste_packages. Users (or roles) with no access (N) are not able to see the My Models panel. User with Read access (R) are able to see the panel and the list of installed models. They are able to check for updates, but they are not able to install, uninstall, or modify models. Users with Write access (W) are additionally able to install, update and uninstall models.
The Marketplace is not visible to users who have no access (N) on the ste_repository right object. Users with Read access (R) are able to browse the Marketplace but cannot install any of the available models. Users with Write or Full access are able to install models from the Marketplace.
Note that if a model executes database scripts during installation, the user running the installation also must have all OLAP rights required for the commands in the scripts. This usually means that rights for creating database, dimensions, cubes, elements, rules etc. will be required.
4. Model Settings
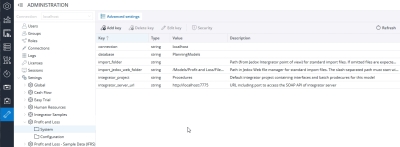
In many cases, models will require some specific settings, such as a database name or connection name. In Administration>Settings, when creating a new settings key, you can select whether the key is “Global” or scoped within an existing model. Model-scoped settings are displayed in separate nodes in the navigation tree.
In Jedox Spreadsheets, model-scoped settings can be retrieved with the CONFIG.GET() function, which has an optional second parameter. In this parameter, you can specify a unique name of a model; the function will then try to retrieve the setting key specified in first parameter within the scope of the specified model. To retrieve the unique name of the model to which the current spreadsheet belongs, the new function MODEL.ID() can be used (the alias PKG.ID() also exists). For example, assume that your model includes a setting “logo_path” (containing an URL to some image). You could retrieve this setting value with: =CONFIG.GET("logo_path",MODEL.ID())
Updated February 3, 2023
