
You can create a Scheduler task to back up a database by right-clicking the corresponding database in Modeler:

Select Schedule Database Backup... A dialog is displayed, prompting you to select the storage location for the backup file:
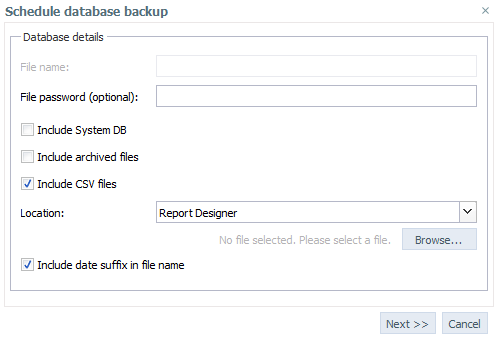
The following storage location options are available:
- Designer stores the backup file within Jedox Web Designer. Use the Browse button to define the location and the name for the backup file.
- File system stores the backup file on the server's file system. You must enter a name for the file. When specifying a filename, the extension (.zip) can be omitted. You can also use a file path in the name, i.e.
C:\Users\ Tom Testuser\Downloads\Biker. Note: the directory must exist when the backup is executed; it will not be created automatically. The backup directory must also be writable for the user executing the Jedox Tomcat process.
On Linux installations, the path is relative to the installation directory of Jedox.
For example, if you enter BikerBackup in the File Name field, your backup file will appear in the installation directory as BikerBackup.zip (or BikerBackup_<timestamp>.zip if the date suffix option is selected).
You can set a password to protect the file. Additionally, you can include the system database and archived files. By default, the backup includes CSV files. If you uncheck this option, the backup is created with binary (.*bin) files. Note: backups created with CSV allow transfer between Linux and Windows, while backups created with binary files are not transferable.
In the following dialog window you can enter the task name for the job, the job type and define further properties:
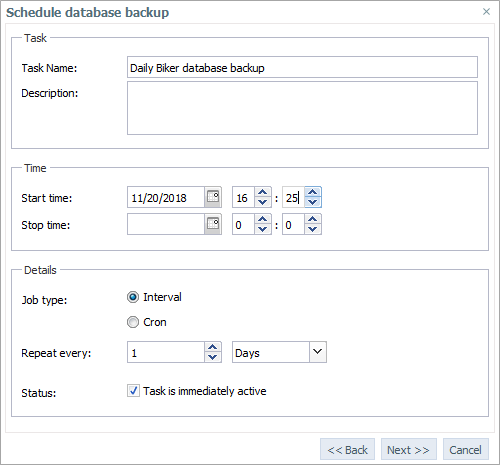
For example, say a Jedox server is physically located in Bucharest (GMT+2). It serves a company located in Berlin (GMT+1). If a user in Berlin schedules a task to begin at 18:00, the task will begin at 18:00 in Bucharest (which would be 17:00 in Berlin). For more information, see .
Click Next. In the dialog windows that follow, you can select the user who is owner of the job and who should receive the job reports.
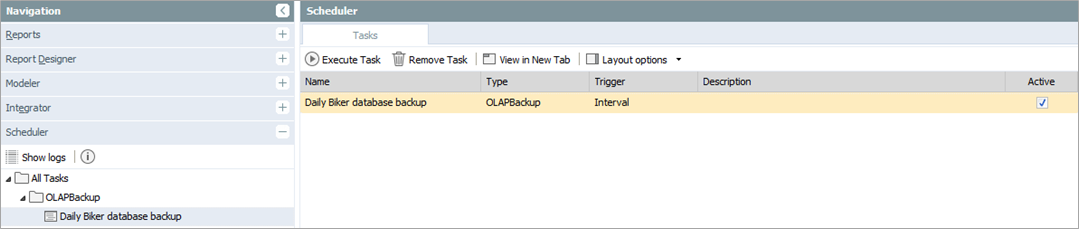
After you have finished the task creation dialog, you will find the created task in Scheduler. There you deactivate, activate, or edit the backup task:
Updated July 3, 2025