
Jedox SAP Connector requires as first step the installation of the SAP Java Connector (SAP JCo 3.1 or higher) on the system where Jedox Integrator (ETL) is running (not on the SAP system). SAP JCo can be downloaded from the SAP Service Marketplace. A valid SAP service ID is required for access to this site.
Installation steps:
- Download SAP JCo 3.1 or higher from SAP Service Marketplace.
- Click Download Software > Download > SAP Connectors > SAP JCo. Based on your operating system, select the appropriate file to download.
- Extract the relevant zip folder to a directory where Jedox is to be installed
- You will need to set the Environment Variables. Go to “Environment Variables” in the System Properties.
/environment-variables.jpg)
- Create a new System Variable called: “CLASSPATH” which should specify the sapjco3.jar file in the SAP JCo install path.
/sapjco3.jpg)
- In the existing system variable “Path”, you need to add the entire SAP JCo install path in the variable value.
/SAP-JCo-path.jpg)
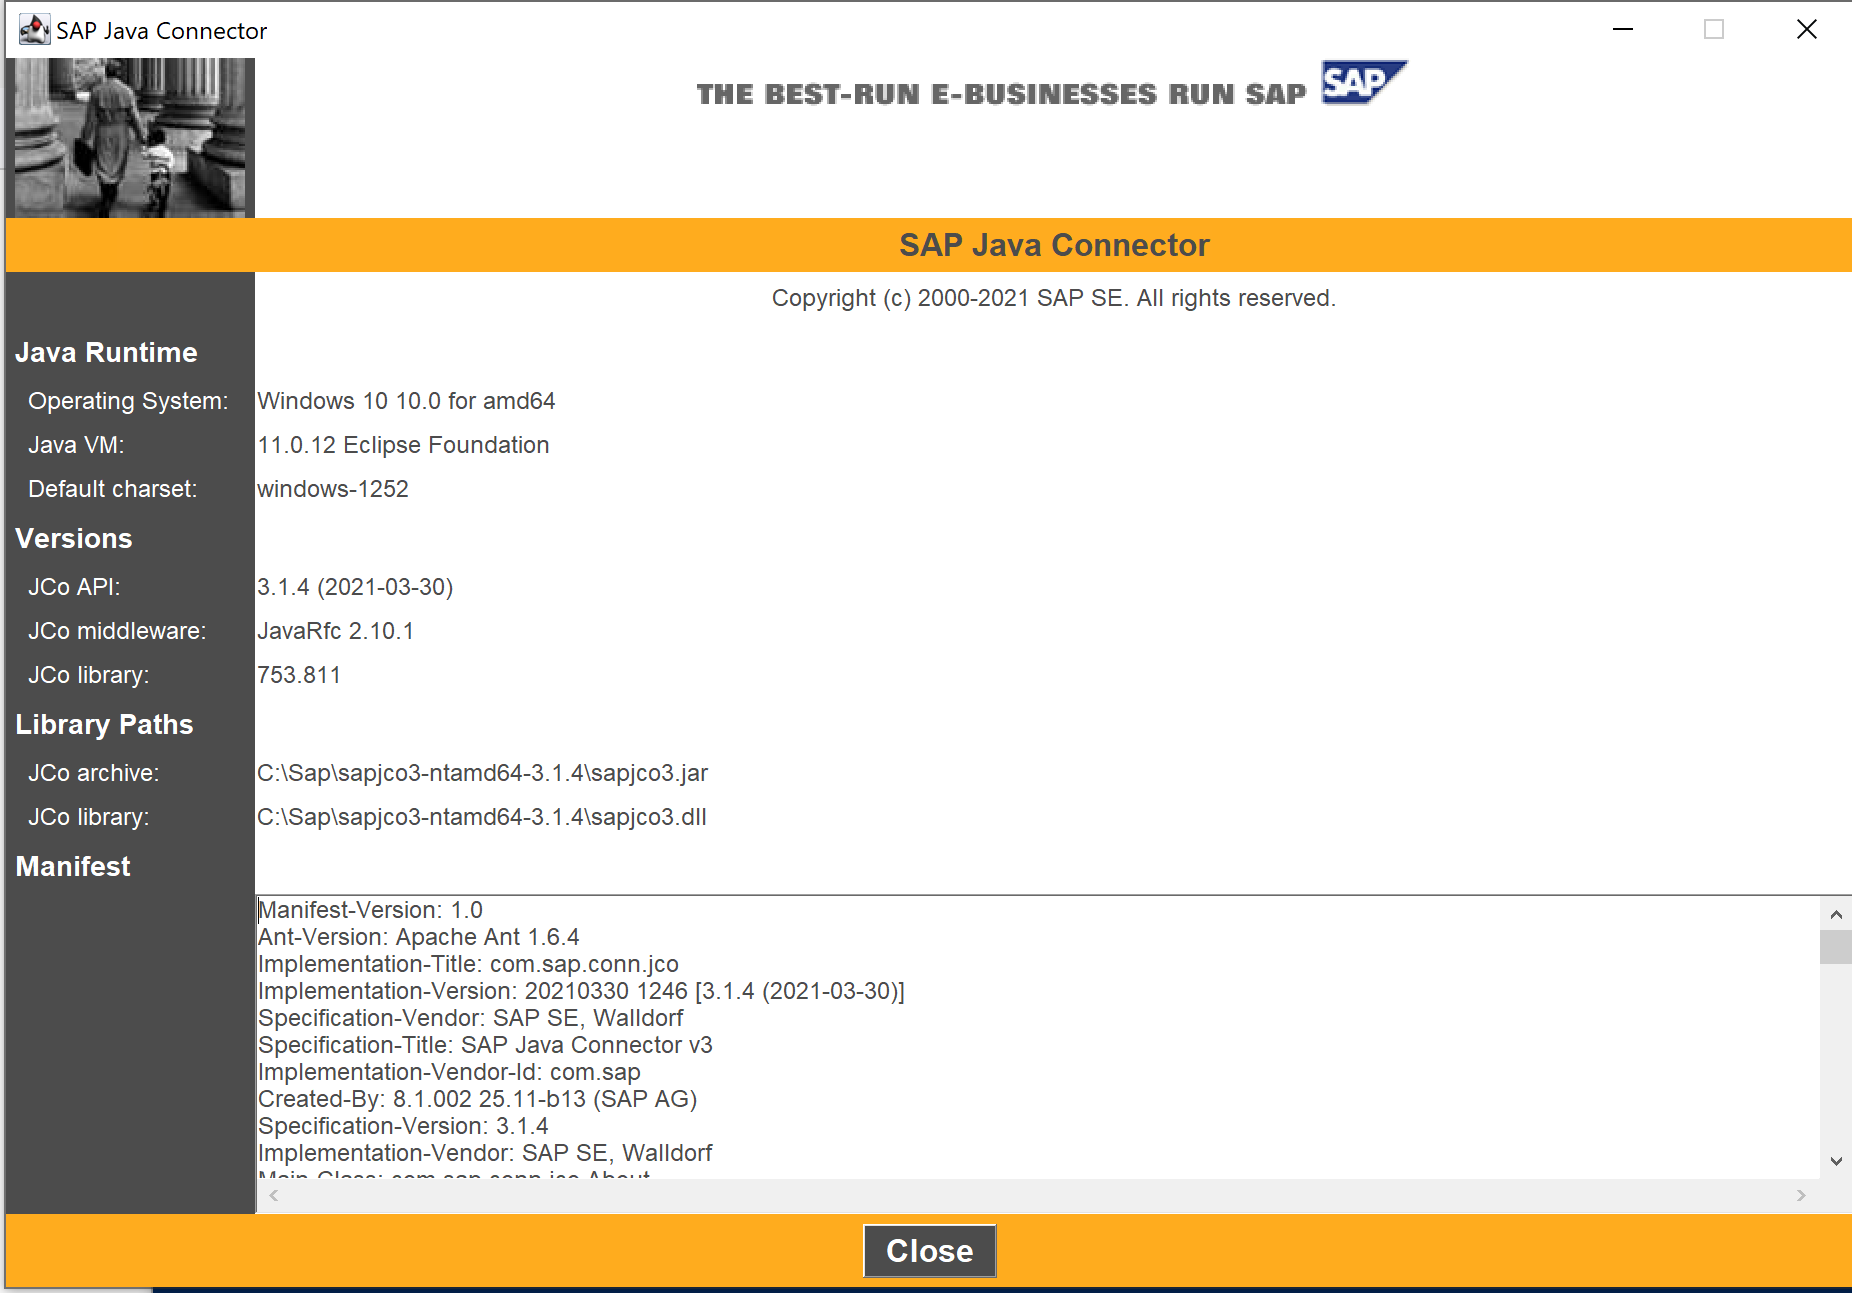
sapjco3-NTAMD64-3.1.xsapjco3.dll,jarfiles, etc. - To verify that the installation of SAP JCo has been done correctly, you can enter the following using command prompt:
java -jar <sapjco-install-path>/sapjco3.jar - The following screen of SAP JCo is displayed. This screen indicates that the SAP JCo installation has been successful. If there was any error, you can see the errors in the window.
Note: For more information on SAP JCo, you can open the Intro document in your SAP JCo install-path in a web browser: <sapjco3-install-path>/javadoc/intro.html.
Next required steps for Jedox SAP Connector installation:
2. Installing Jedox Integrator Add-on SAP
3. *
*Installation of SAP transport packages is only required for SAP Connections in Jedox Integrator.
Updated July 3, 2025